

It’s been a while since I posted anything about my fun times in the kitchen. I haven’t really been doing a lot of creating and experimenting there recently, mostly because I’ve run out of freezer space! Much of what is stored there is to share with my brother to take home when he visits for Christmas, and then I can start cooking again! YAY!
I’ve also been adding posts of a ‘heavier’ emotional weight recently, and I’m sure my fellow readers and I could use a break from that. So… it’s time to put my apron on for a bit….
I no longer get into baking for Christmas. Having been diagnosed with diabetes and having no real space to speak of in my kitchen are the two major reasons. I can’t help but try a sample of each of the variety I make when it’s still warm from the oven, after all – and someone needs to dispose of the imperfect ones without letting them go to waste as well! But, in the days when I baked like the devil in a tailspin, my record was 146 dozen. Yes, that’s right, dozen – the equivalent of 1, 752 cookies! I gave tray upon tray upon tray of cookies away, and the trays also included 3 mini-loaves of assorted breads. Yea, that’s not going to happen again in this lifetime!
I do, however, follow a Christmas cookie baking site on a social media site, probably because I enjoy seeing the artistry with which some people decorate cookies. Visual creativity and the ability to draw are two of my weaknesses.
One that site, however, I found a couple of ‘hacks’ I thought I’d share for those of you who do bake! HACK #1: The cap on a bottle of vanilla equals one teaspoon. To those of you using measuring spoons for several ingredients, this means one less wash and dry between use for each one! HACK #2: If you need to soften butter quickly, but don’t want to melt it, boil water in a microwave safe glass to heat the glass, then dump the water out and flip it over your stick of butter. In a few minutes, it will be soft enough to use for your recipe.
Okay, that’s it for my hacks. Although I don’t make cookies, I still do some baking. I recently made one of my favorite desserts to make as a gift to someone who is a proclaimed chocoholic. I shared the recipe and photos on another social media site, and my friends from the Netherlands, who saw it and both follow my blog, suggested I post the recipe and photos here. So, Nurse and Belly (yes, more Mixer family folks!), this is for you!
Death by Chocolate – ingredients: One box of cake mix in dark chocolate/chocolate fudge flavor (any brand will do). One box of instant chocolate pudding (dark chocolate if you can find it). Two boxes of instant mousse mix (again, in dark chocolate if you can find it). One large tub of whipped topping (any brand will do). Your choice of add-ins, such as chocolate chips, broken candy bar pieces, etc. (You can use other items, such as peanut butter chips, nuts or espresso beans, but I think it’s better to stick with something chocolate.) Chocolate syrup is an optional additional ingredient.
Bake the cake according to directions, adding the dried instant pudding to the mix. (I use a Bundt pan because I want as much of the cake to be the moist inside as possible, but any pan will do.) Let cake cool according to directions.

After cake has cooled sufficiently, break it into small chunks and set aside in a large bowl. Mix the two boxes of instant mousse mix according to directions on the box. Now it’s time to assemble all of the ingredients together to begin building layers.

This dessert is built in layers, so it’s best to use a large clear bowl if possible, so you can see the layers. In this demonstration, I used a smaller bowl because I was gifting some, but it does make a large bowlful!
The first layer in the bottom of the bowl is cake chunks. On top of the cake, spread a layer of chocolate mousse. On top of the mousse, spread a layer of whipped topping. Sprinkle on some of your add-ons (this layer doesn’t show so you can be sloppy) and swirl with chocolate syrup (optional).

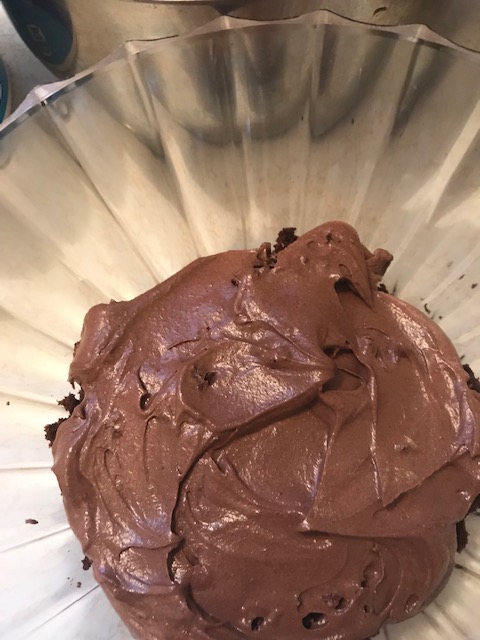

From there, you just keep repeating the layers, always ending with the whipped topping on top. My BIGGEST suggestion is that you don’t fill the bowl to the brim so that you can cover it with plastic wrap. It does need to be stored in the fridge. In the end, it looks something like this:


Even though my sample is only two layers, you can see how spectacular it looks from the side, and that’s why a clear bowl is the way to go!
This is a dessert that any hostess would enjoy putting on her table if you bring it with you for a dinner invitation. This is a dessert that can be delved into a spoonful at a time whenever you crave just a bite of something sweet. And this is a dessert that takes a little bit of time to assemble but is easy to make! So try it! And enjoy!

It has been awhile since we have gotten your helpful hacks and this episode brings us such delightful tricks and treats. My freezer is almost empty…. …just saying… ❤
LikeLiked by 1 person
More and yes please. Cheesecake is more of my weakness and I’ve been known on an occasion or 6 to have a cheesecake dinner. Like..
An entire cheesecake
Hah!
LikeLiked by 1 person
Good New York style cheesecake with no toppings will always be one of my top 3 favorite desserts and it’s not #3 on the list! LOL However, cheesecake is a diabetic’s nightmare! I found a restaurant about 20 minutes away that offers a sugar-free (use Splenda) cheesecake that is delicious. They have an amazing display of all of their homemade desserts! The sugar-free cheesecake goes quickly, so I always call to see if they have it before I go there. I’m tempted to buy an entire one, telling myself I can freeze it. But CAN and WILL are two different things! LOL
LikeLike